Hello everyone! In this blog post I’ll show you step-by-step how to operate the 3DRudder Foot Mouse, an essential computer accessibility tool.
Note: This tutorial provides instructions for how to use this device as a mouse for your computer. One of the goals of this blog is to provide tips on how to use a computer without the use of your hands, and reduce the risk of repetitive strain injury. I know this device is capable of many other things, especially in the gaming and VR world, but that stuff is out of scope for this blog post.
Foot Wings
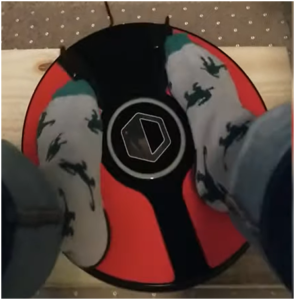
First, once you get your new foot mouse out of the box it’s a good idea to attach these little foot guards or foot wings or whatever you want to call them.

Figure 2. Foot wings front view

Figure 3. Foot wings front view
As you can see here, mine is already assembled so here is a video which I think does a fine job of showing you how to install them. It’s pretty easy. https://www.youtube.com/watch?v=_Afn9cL8lOU
These foot wings are not necessary to operate the device, but they make the device much easier to operate with your feet.
Device Placement
Make sure that the device is laying on a hard, flat surface. If your desk is on tile or carpet, then I recommend you just get a flat board to lay on the floor, and put the foot mouse on the board. This is because the device is much more responsive when it’s on a hard flat surface.

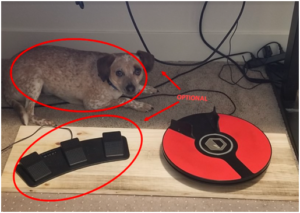
Figure 5&6. I use a ¾ inch wooden board that I got from the hardware store to lay on the carpet of my home office.
Device Setup
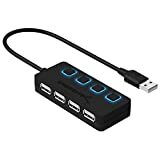
The 3DRudder Foot Mouse connects to the computer through the USB port. My laptop only has one USB port, so I used this USB splitter:
Driver Settings
Once your device is placed on the floor and plugged into the USB port, you’ll need to install the driver software. It’s pretty straightforward, but because your foot mouse is not set up yet, you may have to use a regular mouse through this exercise, or ask for help if you have that option. I’m not going to show you how to do this – instructions are included in the box, and here’s a link to the 3DRudder website where you can download the driver software yourself: https://support.3drudder.com/portal/en/kb/articles/get-started-in-4-easy-steps
There is also a tutorial exercise included in the driver software. I’m not going to show you that either, because it includes some motions that we don’t need for mousing, and it’s more of an FPS video game tutorial. So now let’s get to those mouse settings!
Figure 8. 3DRudder foot mouse driver settings menu

Figure 8 above shows the 3DRudder Mouse settings. To activate mouse mode, follow the numbered steps labeled on the image and correspondingly described here:
- Open the driver settings and click on the Mouse icon in the navigation panel.
- Update the settings per your preferences. Here’s my take on what each of the settings means:
- Deadzone is how accurate the device is at reading the input – high deadzone means it’ll be less responsive. Too low of a deadzone, and the device might take an input that you didn’t mean to give.
- Delay is how long you want to hold your toe down on the foot mouse before it double-clicks and hold-clicks.
- Speed is the speed of your mouse across the screen, or speed of the scroll up and down in your window.
- Click Activate Mouse Mode in order to turn on your Foot Mouse.
Then save your settings as the default, or save a profile with the “save settings as” button.
When manipulating your foot mouse settings, start slow, and just change one variable at a time, then try some mousing activity, make another change, and continue this process until it feels right.
Chair Settings
I recommend you have your chair at the ergonomically recommended height, where your feet are flat on the ground, ankles at 90°, knees at 90°, hips at 90°. See Figure 9.
Figure 9. Sitting ergonomically in the chair
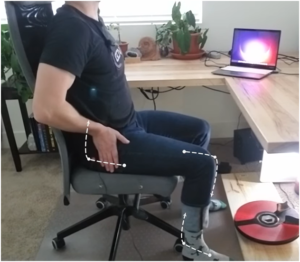
I engage the device by lifting up my feet using my core and hip flexors, or you can do one foot at a time. You’ll hear a beep from the device when it’s engaged.
While sitting and using the foot mouse, I use 3 different postures:
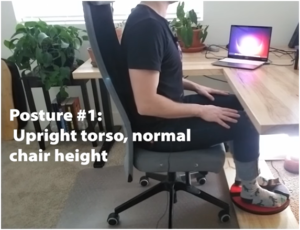
Posture 1
Figure 10. My core is more engaged – I feel my center of mass is kind of forward, ears are still over my shoulders, and the weight of my legs just goes down to my feet. In this position, it’s very easy to control the foot mouse with my calves (gastrocnemius) and shins (tibialis anterior). I find that my core fatigues the fastest in this position, from holding my torso upright.
Posture 2
Figure 11. The other posture is more relaxed in the core. My center of mass is farther back, and some of the weight of my thighs is on the chair. I can still control forward and back with my lower leg muscles, but I engage more hip flexors and upper legs, which can become fatigued as well.
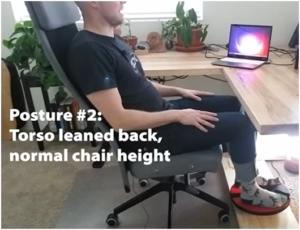
To me, these two foot mouse postures are akin to sitting and standing desk postures. I tend to use the foot mouse without changing my chair height, because I put my feet on the floor between mouse actions, or switch back and forth between foot mouse and stylus mouse and dictation.
Posture 3
The third way is to raise up your chair an additional 2.5 inches, about the height of the foot mouse. This probably makes it easier to foot mouse, but I find it’s a little tall when my feet are on the floor. So it’s always okay to move your chair up and down depending on your mousing activity in the moment. (image not shown – this posture is very similar to figure 11)
Operating the foot mouse
Finally we can start using the mouse! This section will discuss how to move the mouse, click, right-click, double-click, drag-and-drop.
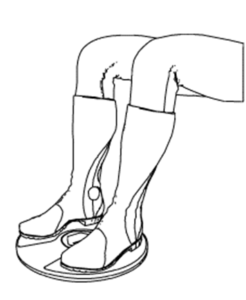
- Go left, go right, go up, go down, go diagonal by lowering/pressuring that respective side of the foot mouse.
- Scroll up and scroll down by twisting the device left and right respectively.
- Left click by pressing with your left toe. It can feel weird at first, but you get used to it fast. You’ll hear it “beep” when it clicks.
- Right click of course is done by pressing with your right toe. It beeps, same as left click.
- To double click, press your left toe and hold the pressure until you hear a double beep.
- Drag-and-drop is done by holding your left toe press even longer, until you hear a third beep, after the double-beep. Then, release your left toe, and the mouse has “grabbed” the object or window.
- See images below – courtesy of support.3drudder.com
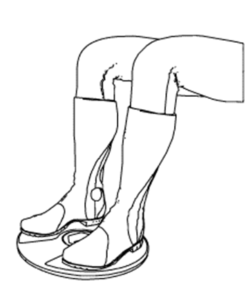
Figure 12. Move the mouse up and down on the computer screen
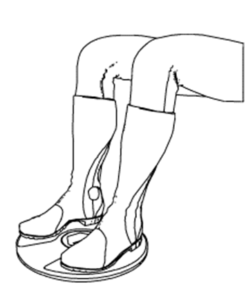
Figure 13. Move the mouse left and right across the computer screen
Final thoughts
That’s the end of the tutorial! In closing, I will discuss some of the strengths and drawbacks of the device.
Strengths
This tool does a fine job at being a mouse. It allows me to surf the web, navigate my computer, and operate in certain apps and other areas where my Dragon dictation has gaps.
This tool also has tons of applications in gaming and Virtual Reality. I did not cover this functionality in the tutorial, but need to mention it – I see the potential in this device to re-enable video games for those who need a hands-free controller or joystick.
I find great success with this device when I use it in conjunction with my Dragon dictation, and other accessibility tools like a foot-pedal and stylus mouse.
Drawbacks
I have some difficulty with the click-and-hold and click-and-drag and sometimes double-click functionality. This device is not a perfect substitute for a regular hand mouse. When we consider the mechanics, this makes sense: two feet are being used to operate the device, which involves the leg muscles (some of the largest muscles in the body) and a higher degree of coordination. A hand mouse is used by only one extremity, and some of the smallest and most precise muscles in the hand and fingers.
Another major drawback is that foot mousing can fatigue your body. Using those leg and foot muscles, including the hip flexors, quads, shins, calves, and toes, definitely causes more rapid fatigue than the small muscles of the hand. Avoid these dangers by taking frequent breaks and rehabilitating your muscles through self massage, stretching and regular exercise. DO NOT CAUSE YOURSELF AN RSI IN YOUR LEGS WITH THIS THING!
Thanks for reading!
Add this device to your RSI toolbox. It’s not perfect but it’s an amazing device that has unlocked the computer for me again.
If you have used the 3DRudder as a foot mouse, then please let us know if you have discovered any good practices and what you think of it.
